Currently we have several SQL Server 2000 DTS packages running within a cluster ,they use few features but move a significant chunk of data by executing stored procedures, creating temporary tables and exporting the results to CSV files. As part of the 2005 cluster upgrade the packages needed to be either;
- Run as 2000 DTS packages in the SQL Server 2005 environment
- Rewritten Integration Services packages.
Both of these options have several flavours to them, for instance I could have embedded the DTS package as a Integration Services task.
Option 2 offered us the ability to take full advantage of our new 64 bit environment and meant we did not have to install the Backward compatibility components since the rewrite was straightforward this was the obvious choice.
The steps to complete this
- Rewrite DTS package as a Integration Services Project
- Configure Integration services to work with our 2005 cluster
- Import the IS package into Integration services
- Schedule the package in SQL Server Agent
- Test the results obtained from the 2005 package against the 2000 results
Rewrite DTS package as a Integration Services Project
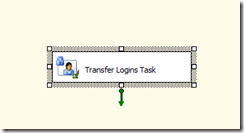
This was straightforward, creating a new Integration services project I was only working with 2 components the Execute SQL task and Data flow task.
Configure Integration services to work with a clustered environment
This step is not necessary in order to get the packages to run, but it is useful for administrating them.
Integration services gets installed as part of a SQL Server Cluster, however it is not setup as a clustered resource and Microsoft do not recommend doing so.
Following Microsoft’s instructions I had to edit the MsDtsSrvr.ini.xml file on all nodes in the cluster, changing the <ServerName>.</ServerName> tag by replacing localhost with the SQL Server cluster network name.
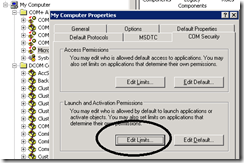
Next the security settings in Component Services need to be modified. The “Launch and Activate permissions” need to be changed in two places;
- Under Component Services > My Computer > Properties
- Under Component Services > DCOM Config > MsDtsServer >Properties
In both cases any accounts that will be connecting to Integration Services will need to appropriate permissions.
One other point on this, it is only possible to connect to SQL 2005 Integration Services from the 2005 Management Studio, it it not possible to connect to a 2005 server from the 2008 Management Studio
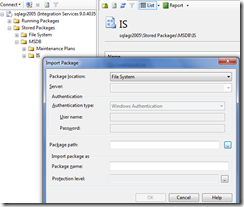
Import the IS package into Integration services
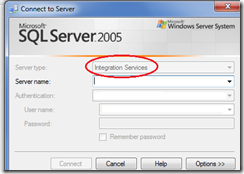
Not that it is possible to connect to Integration through SSMS. I can import the package into the MSDB database.
Firstly use SSMS to connect to Integration services, specifying the SQL Server cluster network name
Once connected add the package to the MSDB database
Scheduling the package in SQL Server Agent
When configuring the package to run as a scheduled task the Windows account under which the package will run requires permissions to execute the package and also possibly permissions to connect to data sources within the package depending on how it is configured. I looked at 2 choices to achieve this
- Give the SQL Server Agent Account the necessary permissions
- Create a proxy account
Looking ahead we will probably need to configure a number of different packages to run on the server over its lifetime, potentially these may be from different business entities, with this in mind using proxy accounts will give us more flexibility.
To create a proxy account
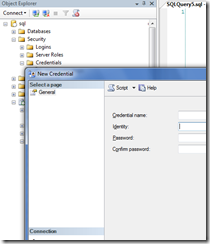
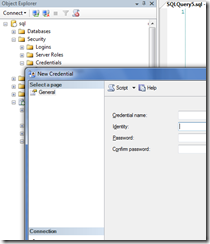
Add the NT users credentials
Create the proxy account
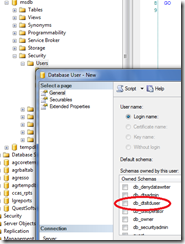
Give the account the necessary permissions
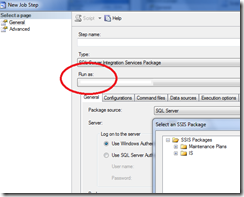
Add the package to SQL Server Agent
To do a comparison between the old CSV and the new CSV file I ran the job I created above when the files were generated I imported them back into SQL Server tables, I also generated the files using the old DTS package but against the same data set, I imported this into a separate set of tables. I then compared the data in both tables using the TSQL except statement to compare the two tables
SELECT * FROM <table1>
except
SELECT * FROM <table2>
As part of doing some research for this, I found the following articles useful
- http://www.sqlservercentral.com/articles/SQL+Server+2005+-+SSIS/upgradingsqlserver2000dtspackagestossis/2201/
- http://blogs.msdn.com/psssql/archive/2009/02/19/how-to-copy-dts-2000-packages-between-servers-and-from-sql-2000-to-sql-2005-and-sql-2008.aspx
- http://msdn.microsoft.com/en-us/library/aa337083.aspx
- http://mohansmindstorms.spaces.live.com/Blog/cns!69AE1BEA50F1D0E7!213.entry
- http://www.sqlservercentral.com/Forums/Topic560372-391-1.aspx
- http://dougbert.com/blogs/dougbert/archive/2009/04/09/ssis-and-clustering-what-you-should-do-instead.aspx

